Most people don't see photoshop as a good drawing program. Well i am here to prove them wrong. This is my tutorial on how to airbrush (which is an extremely useful technique) in photoshop.
For this i am going to assume you know how to use photoshop so i won't explain how to use the tools or anything of that nature. If you don't know, than this probably isn't for you.
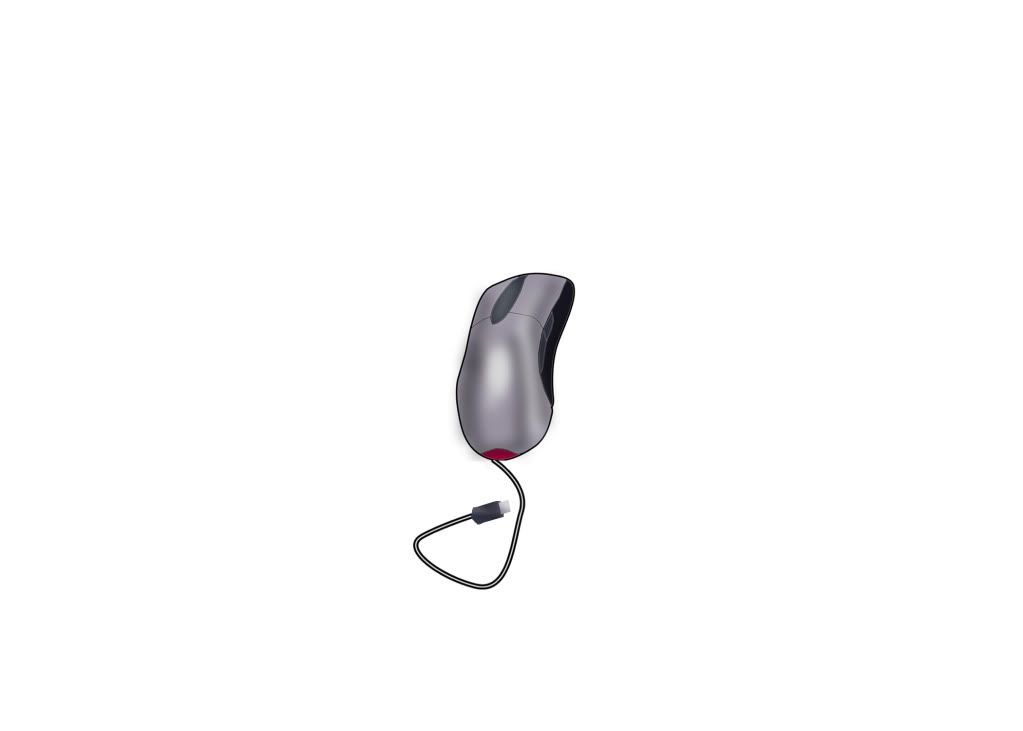
Final Product
Step one
Too start off, open up a new photoshop document with this template i drew.
(if people really want to know how to draw something like that then in photoshop than i will explain it but it's not really important)
Step two
Use the magic wand tool to select each piece of the mouse and then go to edit>fill and fill each part with the colors i provided.
You can change some of the colors if you wish but the light gray should probably stay that way.
Step three
This is the hardest step. Take a medium sized soft edged brush and lower the flow (located right next to opacity) to around 10%. Have your color set to black. Than what you do is use the magic wand tool to select the main parts of the mouse (the light gray parts) and go around the edge with a black brush. Than go over the top of the mouse with a white brush.
Step four
Do the same with the other parts of the mouse.
(i rotated it a little for the next step)
Step 6 (optional)
Use the pen tool to create a path from the top of the mouse, this is going to be the wire so make it curved. Than go to the paths window, (make sure you have a 5 pixel hard brush with 100% flow) and select "stroke path with brush". Than you can just draw a simple USB cable at the end of it.
And then you have a good looking mouse. I could have made the USB look a little better but it wasn't important.
Open a new document with this template i drew (once again, if anybody wants to know how to draw something like this template just say so)
Step two
Fill it in with the colors you want.
Step three
Select each part of the skin and using a soft edged brush with 10% flow, airbrush in shadows as if there was a light source from the right side.
Step four
Now to wrinkle the clothes. Select the shirt and on a new layer, drag the selected area to the side (this just makes it easier to see what we are going to do). In the selected take a 3px hard brush with the same color as the shirt, and draw in places where the wrinkles would be.
(you can't see my selected area here but that is where all those lines are)
Drag the selected area back onto the shirt and apply a Bevel and Emboss, and drop shadow as the layer effects. Then apply a motion blur filter with a distance of 50px and an angle of 0.
Follow all the steps for the shirt for the pants too (you need to make a new layer for the pants also).
I also drew in some shadows on the pants and shirt with a soft edged brush just like i did on the skin.
Step five (pointless)
For no reason, i just stuck him in a random background i found.
(wheres waldo)
Note: I didn't create hair or a face because those weren't the point of the tutorial.